Which Crt File to Upload for Ca
Need assistance installing your SSL? Our experts can do it for you !
Installing document via IIS manager
Importing PFX file
- Create PFX file
- Import PFX using MMC
- Import PFX using IIS Manager
- Assigning a certificate for a website
If the CSR was generated in your browser during the SSL activation
Installing certificate via IIS director
After you receive the issued certificate, you can utilize the Internet Information Services Director to install the certificate on a Microsoft IIS 7 server. The method described below will work only if the certificate asking was generated on the aforementioned automobile using IIS Director. Delight follow the process described below:
Upload the certificate files
- In one case the certificate is issued and sent to y'all by the Certificate Authorization, salve it to the accessible location on your server.
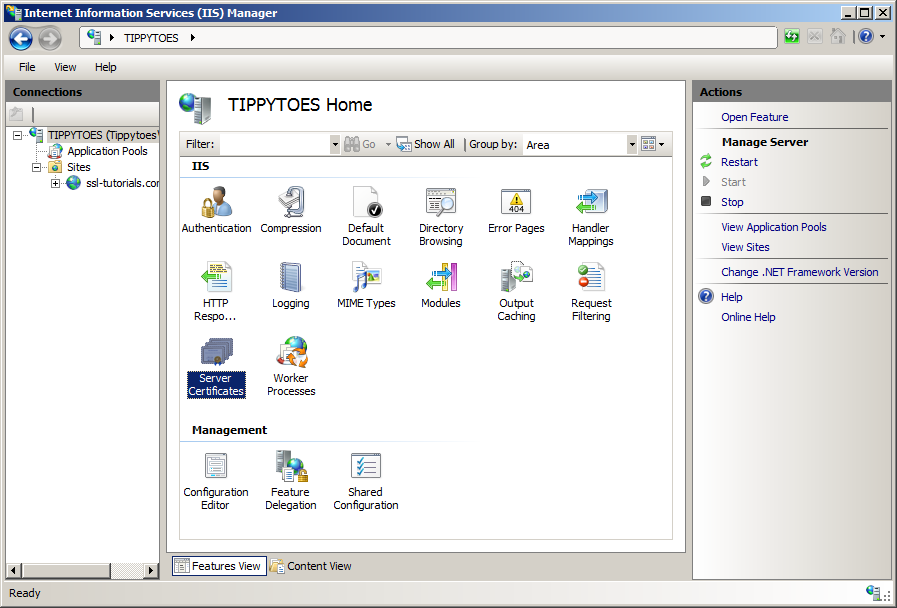
Yous tin can likewise download the certificate in your account with us. The downloaded nothing file volition have a *.p7b file which tin can be used for the certificate installation on IIS. - Open Net Information Services Managing director. For this, go to the Offset card, choose Administrative Tools and select Internet Data Services (IIS) Manager. Otherwise, access information technology via Win+R >> inetmgr >> OK.
- Click on the required server proper noun and go to the Server Certificates pick in the heart carte du jour.
- Press the Complete Certificate Request button in the Actions correct-side section.
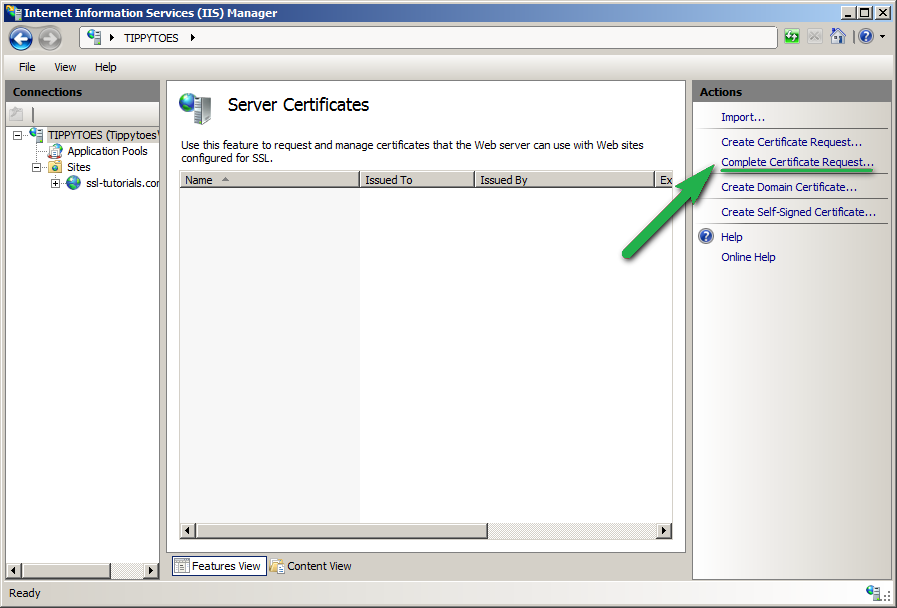
- This volition run the Complete document request wizard. Select the document file from the Certificate Authorisation you saved on your motorcar and give a 'Friendly name' to the document. Friendly name is not a part of the certificate. It is a local name that you lot can give to the certificate to distinguish it among the other certificates on the server. After the file is selected and the friendly name is entered, click OK.

If you lot are importing the certificate in the PEM-encoded format (the file extension volition be *.crt), y'all may also need to import intermediate and root certificates to the server using Microsoft Management Console. The certificates in the PKCS#7 format (*.cer and *.p7b files) do not crave boosted deportment for importing intermediate certificates separately.Note: There is a hazard y'all may receive an error "Cannot discover the certificate request associated with this document file. A certificate request must be completed on the computer where it was created" or "ASN1 bad tag value met" when importing the certificate.
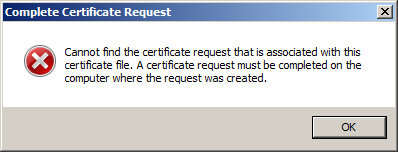
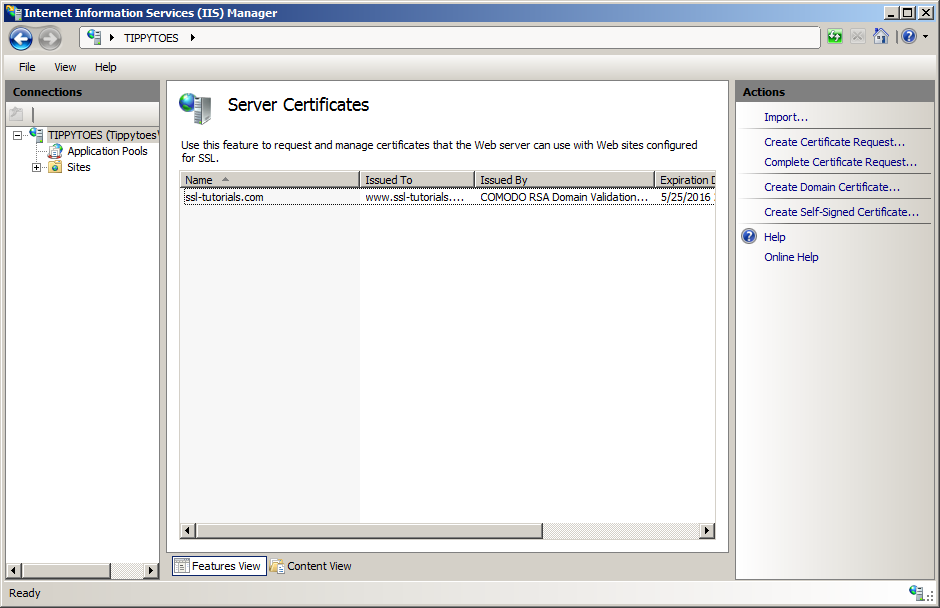
To gear up it, delight cancel the dialogue window of the certificate wizard and printing F5 to refresh the listing of server certificates. You will see that the certificate is imported, just it volition not have a Friendly name. You volition be able to assign information technology to the certificate using MMC. - The imported certificate is now shown in the list of Server Certificates. Now y'all will need to assign the certificate to the website.
Bind the certificate to your website
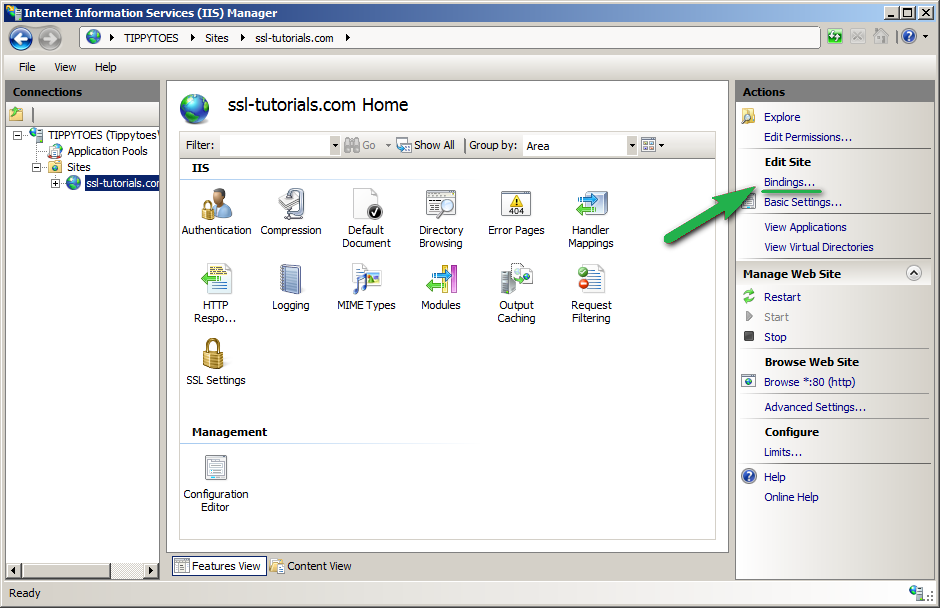
- In the Connections left-side carte du jour, select you webserver, expand the Sites menu and cull the website you desire to assign the document to. After that, click on theBindings option in the Actions section.
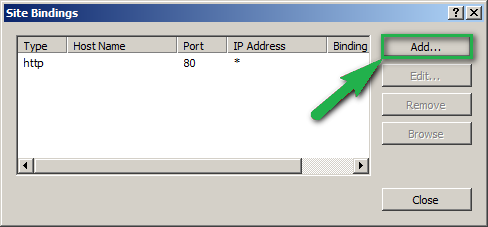
- In the Site Bindings window, click Add.
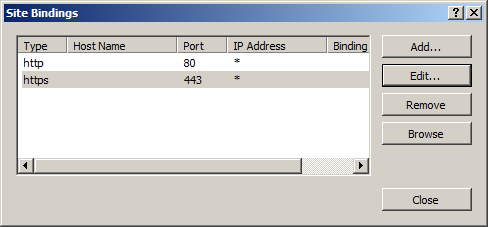
- In the Add Site Binding window, choose the following parameters:Type – https;IP address – All Unassigned, or your IP address;Port – 443;SSL certificate – friendly name of the imported certificate.Subsequently all details are selected, click OK push.

- The new binding has been successfully created.
If the site already has https enabled, and if y'all want to update the SSL certificate, yous will demand to choose the Edit push button in binding for port 443, select a friendly name for the new certificate from the dropdown listing and click OK to apply the changes.
The certificate is at present installed. If https connection is even so not accessible, you may need to restart the website. You can check the document installation via https://decoder.link.
Importing PFX file
Create PFX file
If you take the private key in PEM format (.cardinal file), you need to generate the certificate in PKCS#12 format (.pfx).
Utilise this tool to generate the document in PKCS#12. Utilize your certificate with .crt extension, CA parcel with .ca-bundle extension and the saved key with .key extension.
If there's an OpenSSL client installed on the server, you lot tin create PFX file out of a certificate in PEM format (.pem, .crt, .cer) or PKCS#seven/P7B format (.p7b, .p7c) and the private primal using the post-obit commands.
PEM (.pem, .crt, .cer) to PFX
openssl pkcs12 -export -out document.pfx -inkey privatekey.primal -in certificate.crt -certfile more.crt
*where "more than.crt" is the proper name of the CA Package file
PKCS7/P7B (.p7b, .p7c) to PFX
P7B file must be converted to PEM kickoff:
openssl pkcs7 -print_certs -in certificate.p7b -out certificate.crt Next, run:
openssl pkcs12 -export -out certificate.pfx -inkey privatekey.key -in certificate.crt -certfile more.crt *where "more.crt" is the name of the CA Bundle file
Then import the certificate with .pfx format to your Windows server.
Import PFX using MMC
- Add Certificates (Local Computer) snap-in to MMC following the steps described higher up.
- Once added, right-click on the Personal store >> All Tasks >> Import.
- The Certificate Import Wizard volition be launched, press Side by side.
- Using the Scan push button cull the .pfx file which you lot want to import on your server, printing Next.
- Enter the PFX file password. It was specified during cosmos of the .pfx file. You lot may select Mark this primal equally exportable to have an opportunity to export the document with the private key from this server later. Then click Next.
- In the adjacent dialogue window choose Automatically select the document store based on the type of certificate. This will permit MMC to identify the certificates from the .pfx file to the corresponding folders if the file also contains intermediate certificates. Click Next.
- Click Finish. The certificate has been imported to the server and can be now assigned to the website.
Import PFX using IIS Manager
- Launch Internet Information Services Director (Commencement > Administrative Tools >> Internet Data Services (IIS) Manager), and choose the server the document should be imported on.
- Double-click Server Certificates in the center menu.
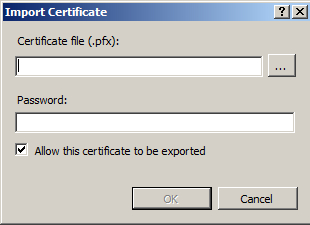
- Click the Import push in the right-side bill of fare:
- Locate the PFX file on your machine and specify the password that was used when exporting the certificate. Optionally, you may check Allow this certificate to exist exported. Then, click OK:
Assigning a document for a website
Once the certificate was imported past any of the methods described above, it will exist shown in the list of server certificates in IIS Managing director and can exist assigned to existing website using IIS.
If the CSR was generated in your browser during the SSL activation
If yous used the "Auto-activate" option and saved the Private key to your PC, you lot'll need to:
- Retrieve that fundamental from your PC.
- Download the SSL files from your account.
- Combine them into a PFX file.
- Import the PFX to the IIS.
rotherbehienceeten51.blogspot.com
Source: https://www.ssls.com/knowledgebase/how-to-install-an-ssl-certificate-on-microsoft-iis7/
0 Response to "Which Crt File to Upload for Ca"
Post a Comment